Wi-Fi Module (GL iNet 300M) Set Up Instructions
Table of contents
- 1. Set up Instructions
- 2.
- 3. 1. Power On
- 4.
- 5. 2. Connect
- 6.
- 7. 3. Access the Web Admin Panel
- 8.
- 9. 4. Go to the Internet section of the admin panel
- 10.
- 11. 5. Connect GL iNet to Seneye Web Server
- 12.
- 13. 6. Finish setting up GL iNet
- 14.
- 15. Reset Instructions
- 16.
- 17. Troubleshooting
Set up Instructions
For visual instructions please visit our YouTube page: https://www.youtube.com/watch?v=yLE62gBYdtc
1. Power On
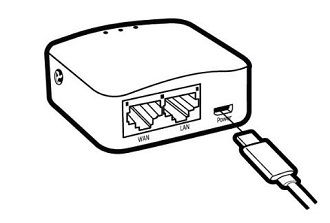
Plug the Micro USB power cable into the power port of the GL iNet. Make sure you are using a standard 5V/1A power adapter. Otherwise, it may cause malfunction
DO NOT PLUG IN THE ETHERNET CABLE UNTIL DIRECTED
2. Connect
Once the GL iNet is powered it will generate its own Wi-Fi network that you need to connect to in order to set it up.
You can connect using a smartphone, tablet, or PC via Wi-Fi settings.
Please ensure you turn off auto-join to your home Wi-Fi network in your wifi setting on your phone, tablet, or PC.
If you are using a smartphone or tablet fully TURN OFF any mobile data access.
Go to your network settings and join the GL iNet SSID (Service Set Identifier) I.E. Network.
The SSID is printed on the bottom label of the router in the following format:
SSID: GL-MT300N-XX-XXX
password: goodlife
3. Access the Web Admin Panel
Open a web browser (we recommend Chrome, Firefox) and type into the address bar: http://192.168.8.1
You will be directed to the initial setup of the web Admin Panel.
If you receive the 'Your device is not connected to the internet' please refresh the page and check you are still connected to GL-MT300N-XX-XXX.
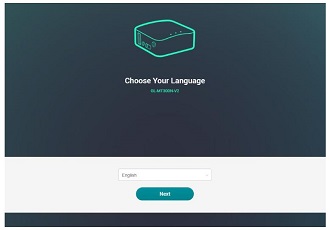
A) Language Setting
You need to choose the display language of the Admin Panel
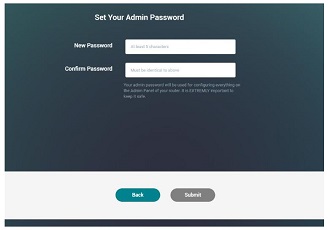
B) Admin Password Setting
There is no default password for this Admin Panel.
You must set your own password, which must be at least 5 characters long. Then, click Submit to proceed.
C) Admin Panel
After the initial setup, you will enter the web Admin Panel of the router.
4. Go to the Internet section of the admin panel
A) Cable section - Click 'Use at LAN'

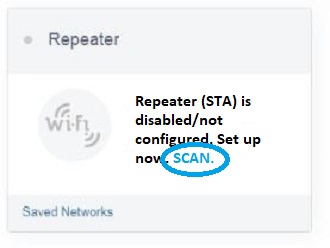
B) Repeater section - click Scan to find your network.
If you see a blank screen you need to turn your smartphone landscape.
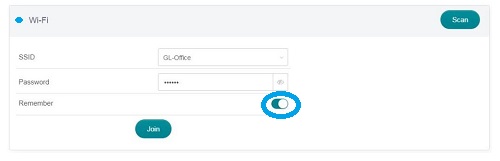
Choose your network from the drop-down list and enter the password.
This is the network your GL iNet will use to connect your Web Server to the internet.
If you have clicked scan and the page does not show the below image, please try refreshing your browser page.
Enable the remember button to save. Click Join.
When connected to your network the circle next to Wi-Fi will be blue.
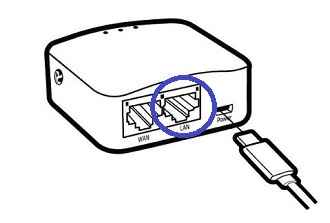
5. Connect GL iNet to Seneye Web Server
Connect the GL iNet to the Seneye Web Server with an ethernet cable. Plug the ethernet cable into the LAN port.
6. Finish setting up GL iNet
Click on the main menu. On your smartphone, this will be the three little lines in the corner.

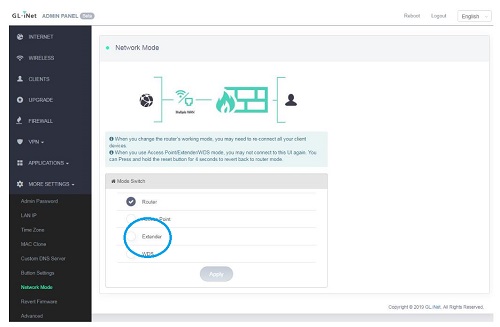
Click on More Settings > Click on Network Mode
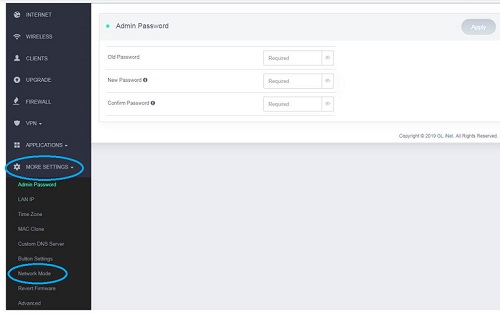
Select Extender. Click APPLY
Choose your network, fill in the password and click APPLY.
Once connected, if you refresh the page you will get the 'Device not connected to the internet message' and your SWS will be connected to the internet.
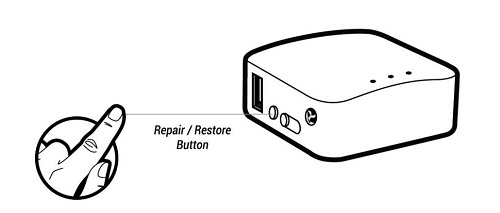
Reset Instructions
If you change your network provide and receive a new router, or change your network password, after you have set up your module, you will need to reset your GL iNet.
To reset the module to its factory settings press and hold down the reset button for 10 - 15 seconds then release. All user data will be cleared.
Please then wait 3 - 5 minutes.
Once the GL iNet has been reset the light on it will flash and it will appear on your network settings. (Follow set up instructions from stage 2).
Troubleshooting
If you are having trouble setting up your wifi module, please try performing a firmware upgrade.
To do this, please go into the blue side menu and select upgrade. (if viewing on mobile, please click the three lines in the top corner of your screen)
Please then click online upgrade. Please see picture below for reference:

If you are having trouble with the module disconnecting, please try resetting the module and setting it up again following the instructions above.
IN STEP 6, PLEASE SELECT WDS MODE RATHER THAN EXTENDER MODE.