Leak Detector Setup Instructions
Table of contents
- 1. Notes for Beta Testers.
- 1.1. Please read Carefully.
- 1.1.1.1. The seneye team,
- 1.1.1.2. X
- 1.1. Please read Carefully.
Notes for Beta Testers.
Please read Carefully.
Please report all bugs to [email protected]
Below are instructions on how to connect your Leak Detector to your existing Seneye monitoring system:
1. Upgrading your Seneye Web Server's firmware
Before your Leak Detector can be connected to your SWS, the firmware needs to be upgraded in preparation. To do this, please send an email to [email protected] letting us know that you have a Leak Detector. Our support team will then upgrade the firmware and let you know when this has finished. To confirm that your firmware has finished upgrading, please check your SWS's GUI and look for the 'Leak Detector' tile. For instructions on finding the GUI, please click here. You will only be able to view your SWS's GUI from a device that is on the same network as your SWS, for instance, the same wifi network.
2. Connecting your Leak Detector
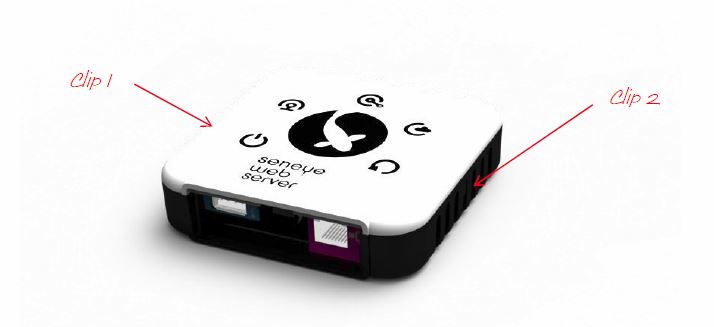
After you have confirmed that your SWS's firmware has been upgraded, it's time to connect your Leak Detector. To do this, please disconnect your SWS from its power source and then remove the back by pressing in the clips on either side:
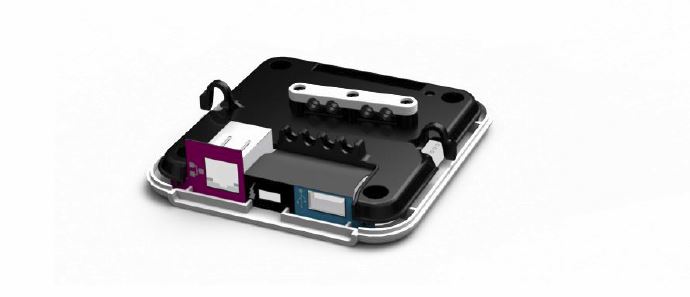
With the back off your SWS, connect your Leak Detector's cable to either the port marked 'C' or marked 'D', these are the only ports with which the Leak Detector will work. Don't forget that you can unscrew the white bracket in the centre of the SWS to keep the Leak Detector lead more secure. Once your Leak Detector is connected to your SWS, you can then replace the back of your Web Server.
3. Testing your Leak Detector
With your Leak Detector connected, you can power up your SWS again and you should see the lights on the front start circling to show that it is booting up. When the SWS has finished booting up and the lights are more stable, add a drop of water to the golden surface of the Leak Detector and check whether you receive an alert. Please also check on your Web Server's GUI and your seneye.me dashboard to see if they register the alert, though your dashboard may take a longer time to update.
After you have tested the Leak Detector please ensure that you wipe off any residual moisture, especially if testing with salt water, in order to preserve the device's sensitivity.
4. Setting up your system
Once you have gone through these steps and made sure that your Leak Detector is in working order, you are ready to set up your system again! Place your Leak Detector in the most likely place for moisture to gather in the event of a leak, and reconnect your sensor to your SWS and place it back in your tank.
If you have any questions or anything to report throughout the beta, please email [email protected].
We hope you enjoy your Leak Detector and thank you for being a beta tester.
The seneye team,
X